This 100% whole wheat 100% hydration no-knead bread is easy to make and super tasty.
Not too long ago I posted a video for a 100% hydration no-knead bread that was made with white flour. As soon as I posted it people started asking me about a whole wheat version of it. So, here it is.
The process is identical and all it took to convert the recipe is swapping out the flour. Sometimes the easiest path is the right one.
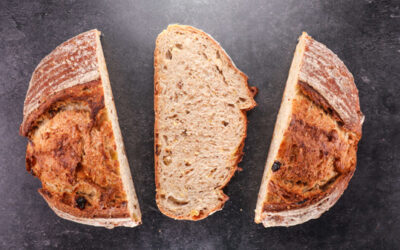
The bread is incredibly light and airy and has a great flavour from the whole wheat flour. It will make amazing sandwiches. Think of it as a super light and soft ciabatta.
Ideally, you should bake it on a solid pre-heated surface for the best rise, but you can also use a regular baking tray if you don’t have a pizza stone or pizza steel.
This recipe makes 2 large loaves. You can divide the dough into 4 to make smaller ones or you can double the recipe to make more large ones. Just be aware that a larger dough will be harder to handle, and you may need to add an extra fold and decrease the folding interval times.
Watch the video down below for detailed instructions.
Ingredients
For the dough –
250g (8.8oz) whole wheat flour
5g (0.17oz) salt
2g (0.07oz) instant dry yeast or 2.4g (0.085oz) active dry yeast or 6g (0.21oz) fresh yeast
250g (8.8oz) tepid water*
*To learn more about dough temperature control click here.
15g olive oil for greasing the tray
The flour I use has a protein content of 13%.
If you are using active dry yeast, then you may need to let it sit in the water for 10 minutes before adding the other ingredients or else it could take a lot longer to raise the dough.
Method
1. In a large bowl combine the water, yeast, and salt. Mix well to dissolve the salt completely because this is your only chance to do it.
2. Add the flour and mix until there is no dry flour left. Keep mixing vigorously for another minute to get a little bit of gluten going. *Desired dough temperature 24C – 25C (75F – 77F). If your dough is warmer, then it will ferment more rapidly. If it is cooler, then it will take longer. Adjust proofing time accordingly.
3. Pour the oil in a tray and pour the dough onto the oil.
4. Cover and ferment for 20 minutes.
5. Perform a bowl fold.
6. Cover and ferment for 20 minutes.
7. Perform coil fold #1.
8. Ferment for 20 minutes.
9. Coil fold #2.
10. Ferment 20 minutes.
11. Coil fold #3.
12. Ferment for 40 minutes.
13. Turn the dough out on a heavily floured surface. Dust the bottom of it with flour too. Stretch it out gently so that it is nice and even.
14. Cut the dough in half and dust the cuts with flour so that they don’t stick to anything.
15. Transfer the loaves to baking paper leaving a decent gap between them.
16. Dust with flour, cover, and final proof for 40 – 60 minutes. *During this time pre-heat your oven to 230C (445F) fan off.
17. Slide the loaves in the oven carefully. Bake for 20 minutes.
Keep in mind that the conditions in each kitchen are different, so fermentation times may vary for you. It is up to the baker to control the bread and react accordingly.
Your oven may be different too, so your baking time may vary.
Watch the video here