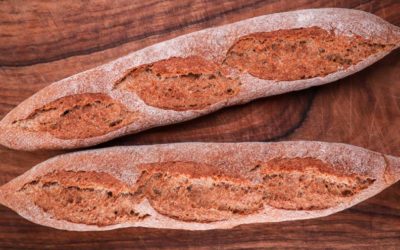
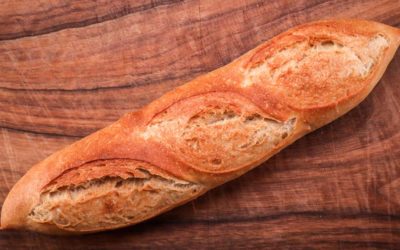
Pain d’epi or wheat stalk bread is a kind of French baguette. The process of making it is the same up until the scoring. Where a regular baguette gets slashed with a razor a few times diagonally, pain d’epi gets cut up with scissors.
This makes it quite different. The deeper cuts create more surface area, and the bread becomes a lot crustier. It is a great tear-and-share loaf as you can pick it apart piece by piece. This would work great with some tasty soup. This recipe makes 2 decently sized baguettes. Multiply the amount of ingredients to make more.
Check out the bread with preferment page for more delicious breads that use a similar preparation method to this one. Preferments open a whole new world of bread making.
Watch the video down below for detailed instructions.
Ingredients
For the poolish –
90g (3.2oz) strong white bread flour
Pinch of yeast
90g (3.2oz) cold water, if it is summertime and your kitchen is hot.
To learn more about dough temperature control click here.
For the main dough –
200g (7.1oz) strong white bread flour
6g (0.2oz) salt
2g (0.07oz) dry yeast or three times the amount of the amount of fresh yeast
90g (3.2oz) cold water if it is summertime and your kitchen is hot. If your kitchen is cold, then use warmer water.
To learn more about dough temperature when using a preferment click here.
Linseeds for sprinkling (optional). You can use different seeds too.
Method
- Make the poolish by mixing the water, yeast and flour and fermenting for 10 – 12 hours or until doubled in size. If the poolish is fermenting rapidly and you are not ready to make the dough yet, then you can place it in your fridge to slow down the fermentation.
- Add the remaining water, yeast, salt to a bowl mix to hydrate the yeast and dissolve the salt. Add the poolish and the flour. Mix until well combined.
- Tip the dough out on your work surface and knead for 5 – 7 minutes. Desired dough temperature 24 – 25C (75 – 77F). If your dough is warmer, then it will ferment more rapidly. If it is cooler, then it will take longer. Adjust the proofing times up or down accordingly.
- Cover and proof for 45 minutes.
- Fold.
- Proof for 45 more minutes.
- Divide & preshape. Do not preshape too tightly. We want the dough to be able to relax enough during the 15 minutes of resting so that we can easily shape afterwards.
- Rest for 15 minutes.
- Final shaping. This does take some practice, but it is not too difficult. Watch my hands and take your time.
- Final proof 45 minutes. During this time preheat your oven to 240C (464F) fan off.
- Cut the dough using scissors into the wheat sheaf shape. You can make the segments larger or smaller. The more cuts you make the crustier the bread will be.
- Bake for around 20 minutes until puffed up and golden brown all over. Enjoy whilst fresh!
Watch the video here