I love making ciabatta and if you search my channel, you will find several different recipes for it. This cold fermented version may just be the easiest one.
I have never been one to just stick to a single recipe per type of bread. Some people love to perfect their formula and stick to them, but I find it more interesting to try out several different methods for the same bread. Or perhaps I am still searching for that perfect formula?
Regardless, this is another one for the cold bulk fermentation series that I have been doing lately. Cold fermentation makes life so easy that I just wanted to keep making new recipes using this method. You can pretty much cold ferment any dough.
It does not require you to look after the dough as it is fermenting. You make it, chill it, fold it a couple of times, and then leave it in the fridge for a day until you are ready to shape it, let it rise and bake it. It is that easy.
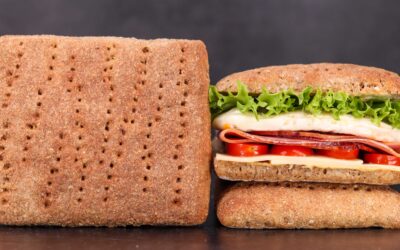
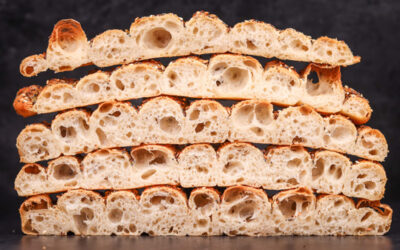
This ciabatta has a hydration of 80%, so there will be nice bubbles in the crumb and the little bit of whole wheat flour provides a great deal of flavour.
So, if you are busy and want a weekday bake, then this one is for you. Or if you want to give cold fermentation a try, then this is a great place to start. If you would like to learn more about cold bulk fermentation, click here.
This recipe makes 4 small ciabattas. To make more simply multiply the ingredients.
Watch the video down below for detailed instructions.
Ingredients
For the dough –
240g (8.45oz) white bread flour
10g (0.35oz) whole wheat flour
5g (0.17oz) salt
2.5g (0.09oz) instant dry yeast or 3g (0.1oz) active dry yeast or 7.5g (0.25oz) fresh yeast
200g (7.05oz) cold water
To learn more about dough temperature control click here.
The flour I use has a protein content of 13%. If your flour is weaker, then you may need to lower the hydration.
If you are using active dry yeast, then you may need to let it sit in the water for 10 minutes before adding the other ingredients or else it could take a lot longer to raise the dough.
Method
- In a large bowl combine the water, yeast, and salt. Mix well to dissolve the salt and hydrate the yeast. Add the whole wheat and the white flours. Mix until there is no dry flour left. I made a mistake here. It would be better if you left the salt out and sprinkled it on top of the dough for the autolyse. It will dissolve and you can continue kneading as per instructions. Salt inhibits gluten formation during autolyse. The recipe will work either way however.
- Leave to autolyse for 30 minutes.
- Knead the dough using the slap & fold method for 12 minutes. *Desired dough temperature 25C (77F). If your dough is warmer, then it will ferment more rapidly. You can fold it at shorter intervals to cool it down sooner.
- Refrigerate the dough for 30 minutes.
- Fold #1.
- Refrigerate for another 30 minutes.
- Fold #2.
- Cold ferment for 24 hours.
- Generously dust your work surface with flour. Tip the dough out on to the floured surface. Dust the bottom of the dough too. It is sticky and there is no way around that.
- Divide the dough into 4. Place the loaves in between the folds of a well-floured cloth.
- Cover and final proof for 2 hours. *During the final hour of fermentation preheat your oven, baking steel or stone or tray and a tray or pan for steaming. 250C (480F) fan off.
- Invert the ciabattas on a piece of baking paper and place them in the oven. Carefully and using oven gloves pour half a cup of boiling water in the steaming tray. This is dangerous so you must be careful.
- Close the oven door and turn the temperature down to 230C (445F). Bake the ciabattas for 17 minutes.
Leave to cool down and enjoy!
Keep in mind that the conditions in each kitchen are different, so fermentation times may vary for you. It is up to the baker to control the bread and react accordingly.
Your oven may be different too, so your baking time may vary.
Watch the video here