The first video I ever posted on the channel was for a basic white bread recipe. And it sure was as basic as it can get. Flour, water, yeast, and salt baked on the same day. I would guess that this is the kind of bread most people bake on their first try at breadmaking. It’s a great starting point and a good way of practicing the skills for making bread by hand. It does not take a long time and it’s super easy.
Later I published a video about an improved version of the basic white loaf which was made using a pre-ferment. This is a slight step up from the basic white bread as it involves extra preparation. The pre-ferment changes the characteristics of this bread. It gives it more depth of flavour, it makes the crust crispier, and the crumb slightly more substantial.
But that was a long time ago and as most of you know by now, I have all but given up on using pre-ferments in favour of cold fermentation. Cold bulk fermentation develops a lot more flavour than a pre-ferment and it removes the extra step of making a pre-ferment. Basically, we are going back to the first recipe, but instead of making it on the same day, we simply mix the dough and leave it in the fridge for 24 hours to develop.
This method simplifies the process and results in a far superior tasting bread. Plus, I decided to use the no-knead method because kneading bread dough is overrated and not required most of the time. Especially when cold fermenting.
This may just be the ultimate version of the basic white bread. Of course, we could improve this recipe by swapping some of the white flour for whole wheat. Or perhaps by adding other ingredients to it or by increasing the hydration. But that is not what this is about. The basic white is basic for a reason.
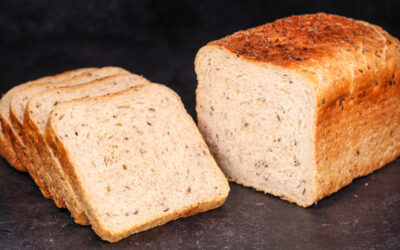
This loaf fits perfectly in a 2lb (900g) loaf tin.
Watch the video down below for detailed instructions.
Ingredients
For the dough –
500g (1.1lb) white bread flour
325g (11.45oz) water*
10g (0.35oz) salt
4g (0.14oz) instant dry yeast or 4.8g (0.17oz) active dry yeast or 12g (0.42oz) fresh yeast
*To learn more about dough temperature control click here.
The flour I use has a protein content of 13%. If your flour is weaker, then you may need to lower the hydration.
If you are using active dry yeast, then you may need to let it sit in the water for 10 minutes before adding the other ingredients or else it could take a lot longer to raise the dough.
Method
- In a large bowl combine the water, yeast, and salt. Mix until the slat has completely dissolved.
- Add the flour and mix until there is no dry flour left. Continue mixing by hand for another 30 seconds to ensure that there are no large lumps in the dough. *Desired dough temperature 25C (77F).
- Place the dough in the fridge to cool down for 30 minutes.
- Give it a fold. This first fold is there to cool the dough down sooner. Folding the cold outside part into the middle will even out the temperature of the dough quickly.
- Place the dough back into the fridge for 24 hours. 12 hours will be enough, but you won’t get as much flavour out of it. On the other hand, you can leave it in the fridge for 48 hours to make it taste more intense.
During its long slumber in the fridge the dough will keep rising and it will rise quite a lot. It is a good idea to fold the dough if it becomes very large. I folded it once more after around 4 hours and then I folded it again before I went to work the next morning. This will prevent it from climbing out of the bowl. And the folds will tighten the gluten and make the dough stronger.
- The dough can be shaped directly from the fridge. Dust it with flour, flatten it and roll it up into a loaf. Do not roll it very tight. Place it in a greased loaf tin.
- Final proof should take around 2.5 hours.
- Bake with steam in a pre-heated oven at 180C (356F) fan off for 40 minutes.
- Remove the loaf from the tin and place it back in the oven for another 10 minutes to set the crust on the sides and the bottom. This will help it keep its shape and it will make it look better.
- Leave to cool down and enjoy!
Keep in mind that the conditions in each kitchen are different, so fermentation times may vary for you. It is up to the baker to control the bread and react accordingly.
Your oven may be different too, so your baking time may vary.
Watch the video here