I had been thinking about buying a mill for a couple of years and plenty of you have been asking me about home milling. My plan was to finally buy a Mockmill Lino 200 as a Christmas present for myself this year.
Coincidentally, a very nice person from Mockmill emailed me and offered to send me the exact mill that I was going to buy anyway before I pulled the trigger. German Santa came early and made my Christmas!
The mill arrived, I unpacked it and checked it out. It looked great, but I did not use it because I wanted to record my first bake using freshly milled flour. So, it has been a couple of months since I received it and now, I’m trying it for the first time.
I can’t say I had done a huge amount of research in preparation for this bake. Besides reading a couple of extremely well put together and informative articles on www.breadbakingathome.com
Generally, freshly milled heirloom non-mass-produced flour will have weaker gluten. That is one thing I was expecting. Milling heats the flour which is something to look out for because too high of a temperature can cook the gluten forming proteins which would make the weak gluten even weaker.
One thing I did to help with dough structure was to sift out some of the bran from the flour which would even further impair gluten development. I used the sifted bran to give the loaf a nice coating.
With those points in mind, I dove right in. The flour was quite warm after milling, at around 44C (111F), so I let it cool down for a while before mixing the dough. The dough felt weak as expected even at a low hydration of only 64%. It reminded me of spelt flour dough.
Thanks to the abundance of nutrients and active enzymes in freshly milled flour fermentation was relatively quick considering the low yeast content of only 0.7%. This would come in very handy for naturally leavened dough.
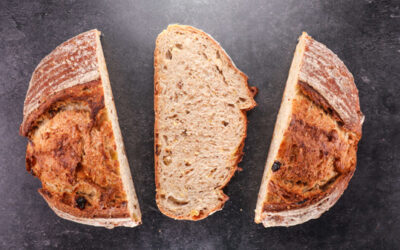
I decided to score the loaf with a straight blade since there was no ‘ear’ to be expected from such a weak dough. It baked nicely and developed a nice brown colour and a crunchy crust.
The taste was nice and light and nutty. The texture was soft and slightly chewy. I’m not one to chase large holes in the crumb because I just like a more tightly packed interior a little better, so the crumb of this loaf was totally acceptable to me.
All things considered this was a good first bake and I’m happy that I could finally bake with freshly milled flour after many years of baking with regular store-bought flour. Home milling seems to have great potential and this first bake is just a baseline to work from.
Now we can get to the really interesting part of answering a bunch of questions about how to improve breads made with freshly milled flours, how to make them more versatile, and easier to work with.
But don’t worry I’m not going to just switch to freshly milled flour and leave most of you behind, that would be crazy. Once I figure this out a little better and once I start producing decent recipes I will make sure to either bake two loaves in each video (one with fresh flour and another one with store-bought) or give you reliable instructions, so you can convert a recipe to be made with store-bought flour.
I will add the recipe for this basic loaf just for reference here.
Watch the video down below for detailed instructions.
For the dough –
400g (14.1oz) wheat gain
250g (8.8oz) water
8g (0.28oz) salt
3g (0.1oz) instant dry yeast
- Mill the flour on the 1st (finest) setting and leave it to cool down. Sift out 10g of the bran and leave it on the side for later.
- Make the dough. In a large bowl combine the water, yeast, and salt. Mix well to dissolve the salt. Add the flour and mix to a dough.
- Cover and ferment for 1 hour.
- Ferment for 1 more hour.
- Pre-shape and leave to rest for 20 minutes.
- Shape, brush with water, and cover with bran. Place in a proofing basket.
- Final proof 40 minutes.
- Score and bake with steam starting at 250C (480F) and dropping down to 220C (430F) as soon as the bread goes in the oven. Bake for 25 minutes.
- Remove the lid or vent the steam and continue baking for another 10 – 15 minutes until the crust starts getting a slight char.
Watch The Video Here