I’ve used modern wheat flour in pretty much every video. Sometimes going with the more nutritious and flavourful wholegrain. Rye flour makes an appearance once in a while here too. I have a couple of spelt flour recipes so far and I’m planning to make more in the future. But einkorn is something I have never successfully baked with.
What is einkorn?
Einkorn is an ancient type of wheat. Think of it as the grandfather of the grains we use to make wheat flour today. The name einkorn translated from German means ‘one grain’, hinting at its purity.
Modern wheat has been hybridized and cross-bred to give it certain characteristics. For one it has a thinner shell and is easier and more cost effective to process. Secondly, it has far stronger gluten than einkorn which is what we all love when making our breads.
But all that development has had some negative effects. While stronger gluten can be beneficial to the process of breadmaking, it can at the same time be detrimental to our gut health. Modern wheat has a lesser nutritional value than einkorn too.
Why does it not seem to be commonly used?
The main thing that may deter people from using it is the price. The flour I used in the video was almost 8 times more expensive than the wheat flour I usually use.
Another deterrent for me personally was the limited knowledge I had about einkorn’s use in breadmaking. Most of the recipes I had found did not look all that great and the fact that it has very weak gluten made my own experiments more difficult and costly.
Handling a dough made with einkorn.
This flour makes very sticky and loose dough. You must wet your hands with water to handle it or dust the dough with flour. Kneading is pointless and can even be detrimental as the dough may get even stickier. As I found in this recipe folding does not add much benefit either besides temperature equalization. Which was not necessary this time as the room temperature and dough temperature were pretty close.
Shaping can be awkward because of the lose structure. You must shape it gently and not try to tighten it as it makes no difference in the end. If anything, the surface of the dough may tare.
How I got to this recipe.
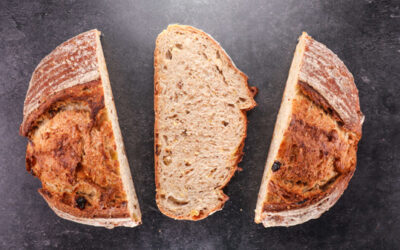
After doing a bit more research and simply looking at the suggested recipe on the bag of flour itself, I came up with what I’m presenting to you today. A very basic, very easy, but good looking and tasty loaf of einkorn bread. It has a light nutty flavour, a nice chewy crumb, and a soft crust. This loaf will fit into 2lb (900g) or 1.5lb (680g) tins.
There will be more recipes with this flour in the not-so-distant future. I’m excited to try it out properly especially because I’m slightly gluten intolerant, so this should be quite good for me personally.
I have to add a disclaimer though! – EINKORN IS NOT GLUTEN FREE. Its gluten is weak, and it should be more digestible, but it’s by no means fit for a celiac.
Watch the video down below for detailed instructions.
Ingredients
For the dough –
500g (1.1lb) wholegrain einkorn flour
5g (0.17oz) instant dry yeast or 6g (0.21oz) active dry yeast or 15g (0.53oz) fresh yeast
10g (0.35oz) salt
350g (12.35oz) water*
*To learn more about no-knead bread dough temperature control click here.
This recipe contains only 1% yeast. That is because whole grain flour ferments more rapidly as it contains more nutrients, and this is especially true for einkorn.
If you are using active dry yeast, then you may need to let it sit in the water for 10 minutes before adding the other ingredients or else it could take a lot longer to raise the dough.
Method
- In a large bowl combine the water, yeast, and salt. Mix to dissolve the salt completely. Add the flour and mix to a dough. *Desired dough temperature 25C (77F). If your dough is warmer, then it will ferment more rapidly. If it is cooler, then it will take longer. Adjust fermentation time accordingly.
- Cover and bulk ferment for a total of 1.5 hours. You can fold the dough halfway through bulk fermentation to even out the temperature, but it’s not essential.
- Shape the dough into a loaf and place in a greased baking tin.
- Cover and final proof for 1 hour. During this time pre-heat the oven to 170C (340F) fan on or 190C (375F) fan off.
- Bake for 40 minutes.
- Remove from the tin and spray with water (optional). This will make the crust softer.
- Place it back in the oven for 5 more minutes to finish the bake.
- Brush with olive oil to give it a nice shine and soften the crust.
Leave to cool down, slice it up and make yourself a nice sandwich!
Keep in mind that the conditions in each kitchen are different, so fermentation times may vary for you. It is up to the baker to control the bread and react accordingly.
Your oven may be different too, so your baking time may vary.
Watch The Video Here