As soon as I baked my first freshly milled flour bread, I started thinking of ways to improve on that base recipe. My first attempt was a simple straight dough mixed and baked on the same day within a few hours.
If you have been following the channel for a little while you’d know how much I like cold fermentation. It improves flavour, makes the dough easier to handle allowing for higher hydration, and it can help with gluten development which can result in nicer ears on scored loaves.
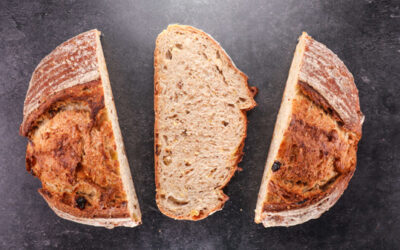
Freshly milled flour makes dough with weaker gluten. On one hand that is a good thing especially if you want a light and airy bread, but it also limits the variety of breads you can make.
To make a taller free-standing loaf with a nice ear the dough needs to be a little stronger. That is where cold fermentation can come in handy. You can use this method for any of your favourite recipes.
There are a couple more things I do to improve the recipe and process. I sift out some of the bran and use it to give the bread a coating. Removing bran also helps the gluten structure. Another thing I did this time is chill the grain in the fridge to lower the milling temperature which prevents the gluten forming proteins from being cooked. It also means we don’t need to wait for the flour to cool down before we use it.
Some of you may notice that this recipe contains a relatively small amount of yeast at only 0.8%. This is because freshly milled flour is more nutritious which allows the yeast to multiply at a faster rate. Usually, I would use 1% yeast for bread made with store-bought flour.
Watch the video down below for detailed instructions.
Ingredients
For the dough –
400g (14.1oz) wheat grain
285g (10.05oz) water
3g (0.1oz) instant dry yeast or 3.6g (0.13oz) active dry yeast or 9g (0.31oz) fresh yeast
7.9g (0.28oz) salt
To learn more about no-knead bread dough temperature control click here.
If you are using active dry yeast, then you may need to let it sit in the water for 10 minutes before adding the other ingredients or else it could take a lot longer to raise the dough.
Method
- Mill the flour and sift it. Reserve the bran for later.
- In a large bowl combine the water, yeast, and salt. Mix to dissolve the salt and to hydrate the yeast.
- Add the flour and mix to a dough. *Desired dough temperature 25C (77F).
- Cover and chill for 30 minutes.
- Fold #1.
- Chill for 30 minutes.
- Fold #2.
- Cold ferment for 18 – 24 hours.
- Pre-shape, rest for 20 minutes, final shape. Place in a breadbasket.
- Cover and final proof for 1 hour. During this time pre-heat the oven and the baking vessel for 250C (480F) fan on.
- Invert the dough onto the hot pan and score Spray with water (optional).
- Cover and place in the oven. Turn the temperature down to 220C (430F) and bake for 25 minutes.
- Remove the lid and bake for 10 more minutes.
Keep in mind that the conditions in each kitchen are different, so fermentation times may vary for you. It is up to the baker to control the bread and react accordingly.
Your oven may be different too, so your baking time may vary.